 |
| Main Page |
Performance Accessories 2" body lift. This lift came with everything you needed to make the installation complete. Instructions were written with no illustrations.
I decided not to repeat information on the installation of this body lift. You will find everything you need at Harry Brosofsky's web site. Harry has a TJ with the same exact body lift. The web site has excellent picture examples along with detail instructions.
You may also visit Paul Davidson's web site. Paul has a TJ with a 3" body lift, having excellent pictures along with detail instructions on his 3" body lift.
|
| Main Page |
 |
 |
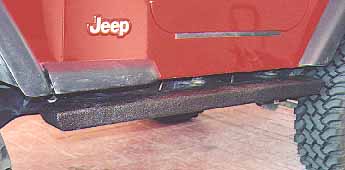
| These steps were custom build by Top Mule 4WD Accessories. They are 1/4" thick steel, they cover my entire rocker for protection and are attached to the frame by a bracket that requires no drilling. I thought about getting rocker panels but I needed a step for my family and myself to make the entry of our lifted TJ a bit easier. The step is lined with a Speedliner to prevent corrosion. It is sealed from all sides so that mud, dirt, whatever can not get in. I've been on the rocks and they have taken punishment without a problem. | |
|
| Main Page |
 |
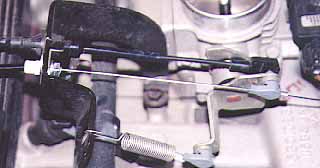 |
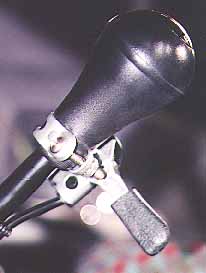
| Rubicon Express Hand Throttle. I have to admit that this was a very simple installation. Before I installed this option I check around all of the web sites that had this installation. They were all good installations. I took ideas from each on what I thought would be the best set up for myself. On the left I mounted the lever the same as Paul D. right on the shifter knob. This allowed me to have the lever closer and easier to use when in operation. On top I took a bit of Harry B. in that I did not wish to drill any brackets and since I did not have cruise control I used the existing throttle holder bracket making my own support. I used TxJeeper's idea on using Mopar's throttle return spring Part # 52078102 which did away with the washer screw installation. |
|
| Main Page |
 |
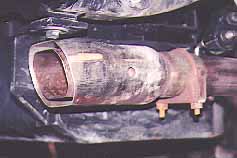 |
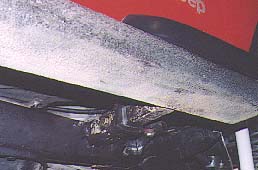
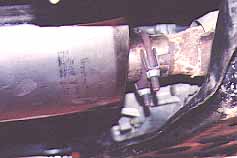
| Borla Cat Back exhaust system. Above
left you will see a picture of the connection at the catalyst converter and muffler. Above
right you will the the end of the tail pipe in which I cut approximately 4 inches. The
tail pipe stuck out too far and it would definitely hit while off road on certain angles.
In this manner it is tucked away nicely underneath the rear bumper providing much more
protection. The Cat Back exhaust gave me a bit more power especially in the low rpms. It also increased my gas mileage by about 3 miles per gallon. It has a deeper sound buy not that loud. If you are looking for a louder sound I suggest to look into a Flowmaster. The Borla came with a 1 million mile guarantee which is more than enough for me. |
|
|
| Main Page |
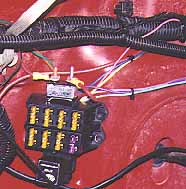 |
Auxiliary Fuse Box: Perfect Performance Products
Inc. Painless wiring. Weatherproof Circuit Boss/7 circuits, Part #70207. My battery connections were getting too busy with all the options that I've added to the TJ. I installed the box under the hood on the driver side firewall. By the time I have installed all my options I should have one left for a rainy day. The instructions that came with the package were simple to understand. The only thing I did different was to install the circuit breaker to the box itself and connected the pink wire to the red/light green wire that came from the wire loom right above the Auxiliary Fuse Box that you see in the picture. |
 |
Auxiliary Ground Strip: Radio shack 8 position
isolator strip & 8 position bus bar. Mounted this on the top passenger firewall. Remove the back poles that come with the isolator strip and mount to the firewall. Make yourself a good ground wire and install to the body ground located at the top of hood or at the center against the firewall. |
|
| Main Page |
 |
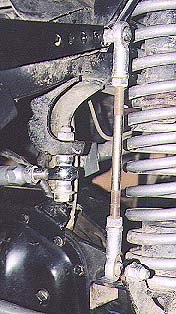 |
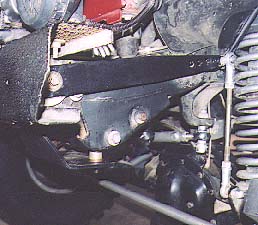
| Replaced my stock TJ swaybar with the
Currie Anti Rock. At first I was VERY skeptic and was afraid that this would limit
my articulation along with being a bunch of hype. I took a chance with the
understanding that I could return this item after trying it out. Conclusion is that
on the street you do get slightly more sway around turns than stock, however I really
don't notice it any longer now that I've been driving with it for a while. On the
trails it does not limit my articulation as I have it set to the highest point. I do
notice that the vehicle rolls less than having the sway bars completely disconnected and
have noticed the tires stay more on the ground on articulation. The installation instructions that came with the Anti Rock were easy to follow being a no brainer. |
|
|
| Main Page |
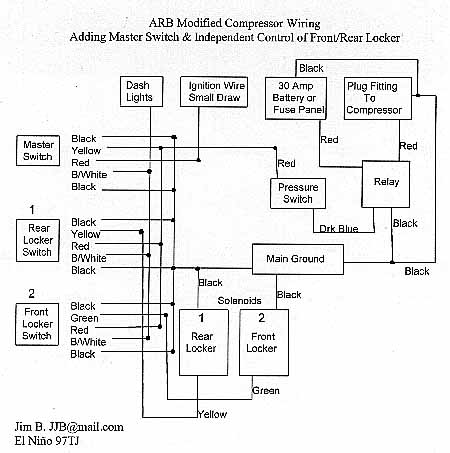 |
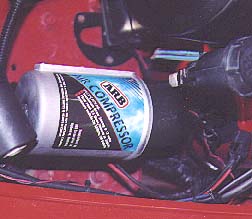
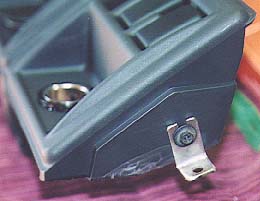
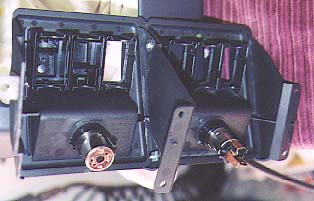
The ARB wiring harness only comes with two switches. One to work the rear and one to work the front locker as long as the rear is engaged. This means that every time you turn on your vehicle your compressor would power up. If someone makes a mistake while your driving down the road to depress the switches your lockers would come on. I did not want this so I drew up a diagram to help me rewire the ARB harness so that I could have a master switch to be able to power up the compressor when I wanted to. This also allows me to work the front locker independently of the rear. I used the Mopar fog light switches instead of the ARB. Recently ARB has modified their switches to be a bit better than their old design. I still prefer the clean look and the way the Mopar switches work. |
 |
|
 |
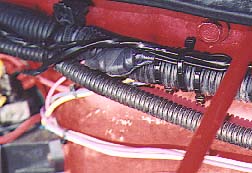 |
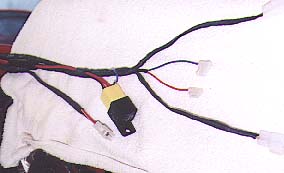
| In the above pictures you will see that I've cleaned up the ARB wiring to the compressor. The connections at the compressor were too far apart and had too much wire. I mounted the compressor on the empty tray below the brake booster. I took my small draw out of the wire loom against the firewall. The compressor was connected straight to battery power and not my spare fuse panel due to the 30 amp draw. | |
 |
 |
 |
 |
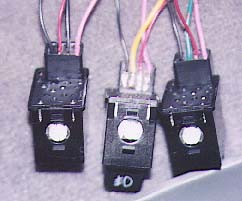
| I followed Harry B.'s idea for wiring in
the switches with the exception that I connected the dimmer and lights to the switches to
allow me to see them in darkness (two additional wires to the switch, what a nightmare
soldering in such a tight space). I tapped into the fog lite switch to power up these two
features. Since I had to make a hole to screw in the right housing for the switches I took out the not needed middle screw receiver and re used it on the new hole I made in the dash. This allowed me not to use any bolts behind the new hole to tighten the housing. |
|
 |
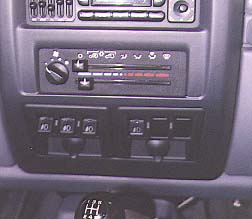 |
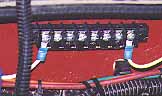
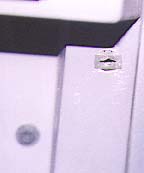
| I joined the two switch housings with three bolt & nuts which held very well. As you can see a picture of the finish product, no gaps in between. I still have two empty covered switch spots left for extra goodies. | |
|
| Main Page |